Sunday, November 24, 2013

Thanksgiving Practice Dinner (Why Did I Think This Would Be Easy?)

Earlier this week I decided that I wanted to try out a few more recipes before Thanksgiving. Somehow I thought I could make green bean casserole from scratch (including making my own fried onions), mashed potatoes with bacon gravy and chicken all in about the same time as a usual dinner. About halfway through the cooking I was thinking, why did I ever think this was a good idea? At least I had made the cranberry sauce the day before.

I was getting pretty stressed when I realized I had been cooking for over an hour and I was still working on the green bean casserole. Tommy was fussy and running back and forth between the living room and the kitchen. It was a really long 2.5 hours. I'm surprised that everything actually came together in the end. It was like our own little mini delicious Thanksgiving dinner. On a weeknight.


I was wiped out and the kitchen was a disaster, but at least the food was delicious. Although Tommy wasn't fooled. Even with gravy he still knew the mashed potatoes were made with white potatoes and wouldn't eat them. 

Since there are several recipes from that night, I decided to give each recipe its own page and just put the links here. 

Gluten and Dairy Free Green Bean Casserole
Mashed Potatoes with Bacon Gravy
Quick Baked Chicken Tenderloins
Cranberry Sauce

Quick Baked Chicken Tenderloins

I had spent so much effort making the green bean casserole and mashed potatoes that I just wanted an easy baked chicken to round out the meal. Straight forward, easy, and tasty. I think we'll be making a variation of this frequently with whatever seasonings I feel like at the time.

Quick Baked Chicken Tenderloins

2 lbs chicken tenderloins, or breasts sliced into strips
1/2 tsp salt
1/2 tsp black pepper
1/2 tsp paprika

1. Preheat oven to 425° F.
2. Spray a rimmed baking pan with oil or nonstick spray.
3. Toss the chicken with the seasonings. Spread chicken on the baking pan in a single layer.
4. Bake for 15 minutes.

Gluten and Dairy Free Green Bean Casserole

Note: For this casserole, I used the solids and liquid separately from one can of coconut milk. I know that the coconut milk I have in my pantry already has the solids and liquid separated. If you're unsure, put the unopened can of coconut milk in the fridge for several hours. When you're opening the can, scoop out the solids to measure 1 cup and then use the remaining coconut milk for the fried onions. 

This casserole took a long time to make, but it was delicious. I love green bean casserole, and this recipe is very similar to the good old traditional cream of mushroom and french fried onion classic.

Gluten and Dairy Free Green Bean Casserole

8 oz cremini mushrooms, sliced

1 cup thick coconut milk solids from can (see note above)
1 cup broth
1 Tbsp canola oil
1 Tbsp sherry
1 Tbsp potato or tapioca starch
1 tsp minced garlic
1/2 tsp salt
1/2 tsp black pepper
1/8 tsp ground thyme
4 cans green beans, drained
3 cups Gluten Free French Fried onions (see below), divided

1. Preheat oven to 425
°F. Spray a 9 x 13 baking dish with oil or nonstick spray.
2. In a large skillet, saute mushrooms, salt, pepper and thyme in oil until browned. Add the garlic and saute for 1 min.
3. Add the sherry and starch, stirring for a minute. Add the broth and coconut milk. Reduce heat and simmer until thickened. 
4. Combine mushroom sauce with green beans and 1 cup of Gluten Free French Fried Onions.
5. Pour casserole into baking dish. Top with the remaining 2 cups of fried onions. Bake at 425°F for 15-20 minutes


Gluten Free French Fried Onions

1 large onion

Liquid from 1 can coconut milk (see note above)
1/4 cup sorghum flour
1/2 cup potato starch
1 tsp salt
1 tsp black pepper
Canola oil for frying

1. Cut onion in half and slice into thin slices.

2. Put the coconut milk into a large bowl. Soak the onion slices in the milk.
3. Combine the sorghum flour, potato starch, salt, and pepper in a gallon ziploc bag. Close and shake well to mix.
4. In a heavy bottomed pot, add enough oil to be at least an inch deep. Heat oil over medium high heat.
5. Working in small batches, shake the excess coconut milk from the onion slices and place in bag. Seal and shake thoroughly to coat all the pieces in the flour mixture. You want the onion slices to be pretty dry. If they are still wet, toss the onions in a little more potato starch.
6. Fry the onions for several minutes until crispy. The onions won't turn dark brown, but they will become more firm when they are crispy. Drain on paper towels. 
7. Repeat steps 5 and 6 until you have cooked all the onions. 

Mashed Potatoes with Bacon Gravy

Bacon is a great way to get a full flavored gravy without pan drippings. I used homemade broth. If you use canned broth, you may want to add more seasonings, like thyme or garlic to the gravy. 

Mashed Potatoes with Bacon Gravy

4 strips bacon
2.5 lbs russet potatoes
1 lb frozen cauliflower
2 Tbsp potato starch
3 cups broth
3/4 tsp black pepper, divided
3/4 tsp salt, divided
1/4 tsp granulated garlic
1 Tbsp refined coconut oil

1. Peel and chop the potatoes. Combine the potatoes and cauliflower in a large pot with enough cold water to cover. Bring to a boil. Reduce heat and simmer until the potatoes are tender. 
2. Meanwhile, cook the bacon in a large skillet until crispy. Remove bacon from the pan, reserving the fat.
3. Whisk in the potato starch and then the broth. Add 1/2 tsp black pepper and 1/2 tsp salt. Simmer over medium low heat until thick, stirring occasionally. 
4. When the potatoes and cauliflower are tender, drain and return to the pot. Add coconut oil, 1/4 tsp black pepper, 1/4 tsp salt, 1/4 tsp granulated garlic and 2 Tbsp of the gravy. 
5. Crumble the cooked bacon and add to the mashed potatoes. Serve with the gravy.

Thanksgiving Recipes, Cranberry Sauce

Ben and I are cranberry purists. We like the simple cranberry, sugar and water mix. I'll let you in on my secret to delicious cranberry sauce. I follow the directions on the bag and then I cook it for a long time. The bag says to cook the sauce until the berries burst, about 15 minutes. But I've found it takes more like 60-90 minutes to get it to the consistency that I like. Maybe the altitude is a factor here. The regular cranberry sauce recipe is the same as the canning cranberry sauce recipe. 2 parts cranberries, 1 part sugar, and 1 part water. This time I made a big batch and used 14 cups of cranberries, 7 cups sugar and 7 cups water. I was REALLY lucky that the sauce didn't boil over. The pot I used for the sauce was way too small for all of that. 


Cranberry Sauce

2 cups whole cranberries
1 cup sugar
1 cup water

1. Wash the cranberries and throw away any that are very soft.
2. In a sauce pot over medium heat, combine the sugar and water, stirring frequently until the sugar dissolves. 
3. Add the cranberries. Cook stirring occassionally until the berries burst and the sauce is thick. (This may take an hour or more).
4. For canning, pour the hot sauce into hot jars and process boil for 10 minutes at sea level or 20 minutes at 5000 ft. 

Monday, November 18, 2013

Updated Apple Pie Pork Recipe

We've made this a couple times, and it's always delicious. We've made it with pork chops and boneless country style pork ribs and the boneless ribs are our favorite. They have more fat marbling than pork chops and don't dry out as much during the cooking. I also increased the amount of potato starch. The fat in the meat combines with the potato starch to make a delicious silky sauce. 

This pork is delicious over white rice or cooked millet. I've recently started cooking the millet in chicken broth instead of water and what a huge difference! It's so much more flavorful. Try this recipe if you have kids that are reluctant to eat meat. 

Apple Pie Boneless Country Style Pork Ribs

2 lbs boneless country style pork ribs
12 small or 8 medium gala apples, cored and diced
3/4 cup sugar
4 Tbsp potato starch
1 tsp cinnamon
1 tsp allspice
1/2 tsp salt

1. Optional: Line crock pot with crock pot liner
2. Place pork at bottom of crock pot.
3. In a large bowl, combine the remaining ingredients.
4. Pour apple mixture over pork.
5. Cook on low 6-8 hours or high 3-4 hours. 


Cooked Millet

1.5 cups dry hulled millet
6 cups chicken broth or water

1. Run your hands through the millet to look for little rocks. Toast the millet in a nonstick pot over medium heat for a few minutes, stirring often. 
2. Add the liquid and cover. Bring to a boil, reduce heat and simmer for 30 minutes.

Saturday, November 16, 2013

Recipe Trial 2 for Thanksgiving, Pumpkin Pie

I think pumpkin pie is one of my absolute favorite parts of Thanksgiving dinner. This year I want Tommy to be able to share in the joy of creamy, spiced pumpkin deliciousness. Last year we made a pumpkin pie with coconut milk and it was good, but I could taste the coconut in it and it just wasn't as good as a regular pumpkin pie. 

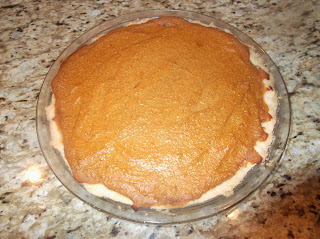
Now that I have a pie crust recipe that I love, it's time to start working on the filling for the pie. The best part of baking a vegan pie is you can taste the filling before you bake it to adjust the seasonings if you want! I already had a container of extra firm tofu so I used that in the pie. It made the texture a little grainy, but the taste was still good. Silken tofu would definitely blend better. Since it's a gluten free pie crust, I didn't bother with pie weights during the first phase of baking. The pie crust didn't bubble up at all. This pie was delicious and the filling was really easy to make. Feel free to substitute any pie crust recipe or store bought if you can.


Vegan Gluten Free Pumpkin Pie

For the crust:
3 Tbsp coconut oil
4 Tbsp vegetable shortening
3/4 cup potato starch
1/2 cup sorghum flour
1 Tbsp sugar
1/2 tsp salt
1/2 tsp guar gum
1/4 cup cold water

For the pie filling:
2 cups pumpkin puree
14 oz tofu (silken or medium firm would be best)
1/2 cup white sugar
1/2 cup brown sugar
1 tsp cinnamon
1/2 tsp ground ginger
1/2 tsp salt
1/2 tsp allspice or 1/4 tsp cloves

For the crust:
1. Measure out the coconut oil and shortening into small pieces and freeze for 10 minutes.
2. Process the remaining crust ingredients except for the water in the food processor. Add the shortening mixture and process until it looks like coarse crumbs.
3. Add the water and process until it forms a ball.
4. On a large piece of plastic wrap, press the dough into a 4 inch disk. Wrap the dough and freeze for 15 minutes.
5. Press the dough into a pie plate. Freeze the dough for 15 minutes.
6. Preheat the oven to 375°F.
7. Bake pie crust for 25 minutes. Meanwhile, prepare pie filling.

For the pie filling:
1. Combine all the pie filling ingredients in a food processor. Process until smooth. Taste filling and adjust seasoning if necessary.
2. Pour into partially baked pie crust. Bake for an additional 25-30 minutes.


Variation, Mini Pumpkin Pies

For 24 mini pumpkin pies, double the crust recipe. After crust step 4 above, press 1 inch pieces of the dough into the bottom of regular sized muffin tins. Skip step 5. For step 7, bake for 15 minutes. Then prepare a single recipe of the pie filling exactly as stated above. Pour the pie filling into the mini crusts and bake for an additional 15 minutes, until the edges of the pie filling are brown.

Thursday, November 14, 2013

Lamb Roast and Lamb Broth

I picked up a 1 lb lamb shank a while back since it looked good but I really didn't have any plans for it. Last night we had a crock pot lamb roast with veggies. And then overnight I made more broth out of the lamb bone and a leftover pork bone that I had in the freezer. The lamb roast was soooo good. My only complaint was that the lamb shank was small so there were no meat leftovers. I served it with my Corn-Free Cornbread. We're still not sick of that cornbread. 


The broth tastes a whole lot like my chicken broth. Oh well, it'll still be good. Just not quite the meaty broth taste I thought it might have. I happened to have a can of beef broth in the pantry and just looked at the ingredients. It includes things like MSG and caramel color. No wonder my homemade broth tastes different. I'll just have to get a little creative to make French Onion Soup taste like it was made with beef broth.


Lamb Roast

1 onion, diced
3 carrots, peeled and sliced
3 ribs celery, sliced
1 lb lamb shank
1 tsp salt
1 tsp dried rosemary
1 tsp ground black pepper
1/2 tsp dried thyme
2 tsp minced garlic
2.5 lbs russet potatoes, peeled and chopped

1. Layer the ingredients in a crock pot in the order listed.
2. Cook on low 7-9 hours.


Lamb and Pork Broth

1 bone from a lamb shank
1 bone from a pork picnic roast
3 ribs celery
2 carrots
1 onion
1 tsp salt
1/2 tsp black pepper
1/4 tsp dried rosemary
1/4 tsp dried thyme

1. Combine all the ingredients in a crock pot. Fill with water. Cook on low overnight (10-12 hours).
2. Let cool.
3. Strain the broth and discard the solids. Refrigerate or freeze in 1 and 2 cup containers.

Tuesday, November 12, 2013

Jello Salad - I'm Becoming a Real Utahn...

Tommy's doing pretty well on his recovery from his tonsillectomy. The first couple days Tommy LOVED jello, but not he's not very interested in it. I'm trying to get creative on soft cold things for him to eat other than applesauce. So I'm going to try my hand at making my very first jello salad. I usually try to avoid things like this, but when your little one isn't feeling well you'll try just about anything. Maybe this is a sign that I'm becoming a real Utahn...

I saw a recipe on Pinterest for a Raspberry Vanilla Jello Salad that you make with cool whip, vanilla yogurt, instant vanilla pudding and frozen raspberries. Since Tommy can't eat any of those things except for the raspberries, I had to do some experimenting. Since I don't know that I've actually eaten a jello salad since I was a kid, this may not be a classic jello salad. But I think it tastes pretty good and Tommy ate it!


Vanilla Berry Tapioca Jello Salad

1 cup refrigerated Coconut Tapioca Pudding (see below)
1 cup refrigerated Berry Fruit Juice Jello (see below)
2 cups frozen mixed berries, thawed

1. Combine the jello and berries in a blender. Puree until smooth.
2. Stir in the tapioca pudding. Serve cold.


Coconut Tapioca Pudding

2 cans full fat coconut milk
1/2 cup sugar
1/4 cup Minute Tapioca
1 1/2 tsp vanilla extract

1. Combine all ingredients in a medium saucepan. Let sit for 5 minutes.
2. Heat mixture over medium heat stirring constantly until it reaches a full boil.
3. Remove from the heat and let sit for 20 minutes, stirring occasionally. Serve warm or refrigerate.


Berry Fruit Juice Jello

2 envelopes unflavored gelatin
1 cup cold berry fruit juice
2 cups berry fruit juice, heated to boiling.

1. Sprinkle gelatin over cold juice in a medium bowl. 
2. Add hot fruit juice. Stir until gelatin completely dissolves.
3. Pour into containers of your choice. Refrigerate until firm, about 3 hours.

Saturday, November 9, 2013

Banana's Foster Coconut Ice Cream

I was searching Pinterest for coconut milk ice cream recipes, and I saw one for a roasted banana ice cream. It had no added sugar. Just bananas, coconut oil and coconut milk. After our disappointing venture into date sweetened coconut ice cream (somehow it tastes like a weird medicinal bourbon), I'm leery of ice cream without added sugar. As Ben said, "There's a reason you never see date sweetened ice cream." I decided if banana ice cream was good, then Banana's Foster ice cream must be amazing! In the pre-Tommy days sometimes I would saute some bananas in butter, brown sugar and cinnamon and serve it over ice cream. So I took those flavors and just blended it all together.

OMG, I wish I had a video of Ben licking the spoon after I poured the mixture out of the blender. He said, "Wow, that could be the best ice cream ever made." Unlike the date ice cream, which tasted good before we froze it but tastes weird now, this ice cream just tastes amazing. It's nice and sweet and the flavors of banana and cinnamon really come through. I think I'll have to make another batch in the near future.


Banana's Foster Coconut Ice Cream

3 medium or 2 large bananas
1 Tbsp coconut oil
1/2 cup brown sugar
1/2 tsp cinnamon
1/4 tsp salt
1 can full fat coconut milk

1. Preheat oven to 400°F. Line a rimmed baking sheet with parchment paper.
2. Slice the bananas in half through the width and half through the length.
3. In a small microwave safe bowl, melt the coconut oil. Stir in the brown sugar, cinnamon and salt. 
4. Toss the bananas in the sugar mixture. Bake for 10 minutes. Be careful, the syrup will be VERY hot.
5. Combine the banana mixture and coconut milk in a blender. Be sure to include all the syrup. Puree until smooth.
6. Cool mixture in a bowl with a spout in the fridge for 2 hours. Follow the directions for your ice cream maker. Enjoy!

We're Home! Creamy Broccoli Soup

Tommy's tonsils and adenoids are gone! His surgery went very well, and after a night in the hospital for observation since he's not even two years old yet, we're finally back home. The first day he was feeling pretty good. He even roamed the halls a bit and played in the peds playroom. But last night and today he's been a lot more miserable. He has a pretty sad little cry and cough and he just seems to be a lot more uncomfortable. Poor little guy. But we're all happy to be home. Now he's had dinner and a bath and he's pretty happy for the moment!

Tommy hasn't been all that interested in drinking today, but he's eating food like a champ. Lots of jello, oatmeal and applesauce. He hasn't had much fat or salt, so for dinner I made Creamy Broccoli Soup and Corn-Free Cornbread. By far this is Tommy's favorite way to eat broccoli.


Creamy Broccoli Soup

1 Tbsp canola oil
1 large onion, diced
4 carrots, peeled and diced
3 ribs celery, diced
1 tsp ground black pepper
1/2 tsp salt
1/2 tsp dried thyme
1 tsp minced garlic
3 chicken broth
2 cups water
2 heads broccoli, chopped
1 can full fat coconut milk

1. Heat the oil in a dutch oven sized pot over medium low heat. Add the onion through garlic. Saute until the onions are translucent.
2. Add the broccoli and broth. Bring to a boil. Reduce heat, cover and simmer until the broccoli is soft (about 15 min).
3. Add the coconut milk and puree the soup with an immersion blender or in batches in a blender.
4. Heat the soup over medium low until warm.

Corn-Free Cornbread

I make this cornbread often enough that I figured it should have its own page for easier referencing. I have made it without the guar gum and it can definitely be omitted, but the texture will be a little more crumbly. You can easily double the recipe and bake it in a 9 x 13 baking dish for 30 minutes.

Corn-Free Cornbread
Makes 9 pieces

2 Tbsp psyllium husks

1/4 cup water
1 cup coconut milk (I use the Silk Vanilla Coconut Milk from the carton)
1/3 cup canola oil
1/4 maple syrup
1 cup millet flour
1/4 cup sorghum flour
1/2 cup tapioca starch
1/2 cup potato starch
2 teaspoons corn free baking powder
1 teaspoon guar gum
1 teaspoon salt

1. Preheat oven to 350°F.

2. Spray a 9x9 inch square baking dish with oil or nonstick spray.
3. In a large bowl, whisk together the oil, milk, syrup, and psyllium husks and water.
4. Add the remaining ingredients and stir well.
5. Pour into baking dish and bake for 25-30 minutes or until a toothpick comes out clean.

Nutritional Info (Calculated from My Fitness Pal)
Calories: 228
Fat: 9 g
Fiber: 2 g
Sugar: 7 g
Sodium: 269 mg
Protein: 2 g

Thursday, November 7, 2013

Anxious Mommy = Delicious Chocolate Dessert

Tommy's getting his tonsils and adenoids out tomorrow. I know it's very routine, but I'm still anxious. He's my baby and I can't help but be nervous. 

I had a nice distraction this evening with a little girls wine, snacks and hot tub at a friend's house. It was a great way to relax and take my mind off of packing our hospital bag. I wanted to bring something to share that was gluten free, so I made some mini chocolate pudding tarts. 

I used the Dark Chocolate Coconut Pudding and Single Pie Crust recipes. This time for the crust I used coconut oil instead of vegetable shortening. 

I made the pudding in advance so it had already thickened in the fridge. I made the crust recipe and let it rest for 10 minutes in the freezer. I took balls of the dough a little less than an inch in diameter and pressed them into mini muffin tins. I baked them for 15 minutes, let them cool for 15 minutes, and then filled with about a teaspoon of chocolate pudding. They are sooooo good. Nice little rich morsels of gluten-free, vegan goodness. 


Mini Chocolate Pudding Tarts

1 recipe Dark Chocolate Coconut Pudding
1 recipe Single Pie Crust

1. Preheat oven to 375°F.
2. Break dough into balls a little less than 1 inch in diameter.
3. Press the dough into mini muffin tins, spreading the dough up the sides.
4. Bake for 15 minutes. Let cool for 15 minutes.
5. Fill each cup with 1 teaspoon chocolate pudding.

Wednesday, November 6, 2013

Recipe Trial Number 1 for Thanksgiving (Corn-Free Cornbread Stuffing with Sausage)

This year we'll be at my mom's for Thanksgiving. For the first time, we're going to try making a complete Thanksgiving dinner that Tommy can eat. So between now and then I'm going to be trying out some new recipes. I've already had two dreams about Thanksgiving, and neither of them ended very well. Both dreams involved me basically doing no preparation in advance and then dinner didn't end up at all what I had hoped. Yes, I am aware that I have very mundane dreams...

The first recipe I'm trying out is a cornbread and sausage stuffing. I had great intentions of grinding my own pork and spices to make sausage. But then I ran out of time. We already had some leftover cooked ground turkey, so I just seasoned that to make a mock sausage. I just mixed the spices in with the cooked turkey, but it would be better to cook them with the turkey. 


Success! If you didn't know better, you might not realize it's a gluten, corn, dairy and egg free stuffing. I still plan on trying a stuffing recipe with Tommy's bread, but so far this recipe is a real contender for Thanksgiving. 

Corn-Free Cornbread Stuffing with Sausage

1 recipe Corn-Free Cornbread
1 lb ground turkey
1/2 tsp ground black pepper
1/4 tsp salt
1/4 tsp ground sage
1/4 tsp smoked paprika
1/2 tsp granulated garlic
1 Tbsp canola oil
1 large onion, diced
3 celery ribs, diced
salt and pepper
2 cups chicken stock
2 Tbsp flaxmeal

1. Preheat oven to 300°F. Break the cornbread into chunks and spread on a rimmed baking sheet. Bake for 30 minutes. Let cool, then transfer cornbread to a large bowl.
2. Raise oven temp to 375°F. Spray a 9" x 13" baking dish with non-stick spray.
3. In a large non-stick skillet, cook the ground turkey and spices. Transfer ground turkey to the large bowl.
4. Add 1 Tbsp oil to the skillet. Saute the onions and celery with a sprinkle of salt and pepper over medium heat until tender. Add to the large bowl.
5. Whisk together the chicken stock and flaxmeal. Let set for a couple minutes. Pour over the cornbread mixture.
6. Gently mix and place in baking dish. Bake for 35 minutes.

Tuesday, November 5, 2013

The Adventure Continues...

Agh. It's been another bout of confusing allergy symptoms. We re-introduced grass-fed beef recently. It seemed to be going ok, but then the horrible diapers returned. Like the worst smelling thing you could imagine. Poor little guy. He still manages to keep his sunny personality even when it's obvious that his digestive track is in turmoil. 

We were thinking maybe it was the beef, or possibly a reaction to trace amounts of egg protein in the flu shot he got on Friday. It's so tough to pinpoint the cause when it's a delayed reaction like diarrhea. It's much easier to figure out what causes it when he has hives or even vomiting. He seemed to be getting better, but now it's back. So maybe he's developed an allergy to salmon too. 

I hope this won't delay his tonsil surgery. As anxious as I am about his surgery (even though I know it's very routine), I really don't want it to be delayed. 

Oh the joys of food allergies...

Friday, November 1, 2013

Sausage Making and Sausage, Kale and Bean Soup

Today I helped one of our friends make sausage. He had already ground the pork and spices together, and I helped him with the stuffing process. He made a delicious Italian sausage and the best part was we knew every ingredient in it and there was nothing Tommy was allergic to. He gave us some sausage to take home and that inspired our dinner tonight. The sausage making process is labor intensive, but doesn't seem too difficult. I'm excited to start making our own sausage too. 

I met with a dietitian yesterday to talk about Tommy's diet. I make a conscious effort to provide a balanced diet for him, but with all of his food allergies I was worried that there was some sort of hole in his nutrition. She gave me some resources including a handout on how many servings of each food group kids need in a day. And reassured me that Tommy's diet looked great and well balanced. She did say that if she had to pick one super food, it would be beans. She recommended cooking any veggie Tommy can eat with the beans as an easy all in one meal. 

So, tonight we had Sausage, Kale and Bean Soup. Ben and I loved it. Tommy wasn't as thrilled. He's not a big fan of tomatoes or kale. But it was a good exercise in fine motor skills as he meticulously picked out things from his bowl. And Lily seemed to like the soup a lot as she ate it off the floor.


In other news, who decided it would be a good idea to give a toddler chocolate pudding? Oh right, that was me...


Sausage, Kale and Bean Soup

3 links Italian sausage
4 carrots, peeled and diced
2 celery ribs, diced
1/2 large onion, diced
1/4 tsp salt
1/2 tsp pepper
1 can diced tomatoes
1 can Great Northern Beans, rinsed and drained
1 can chicken broth
2 cups water

1. Remove sausage from casings. Brown in a non-stick dutch oven pot over medium heat.
2. Remove sausage from pot and leave the grease in the pot. Add the carrots, onion, celery, salt and pepper. Cook veggies over medium heat for several minutes until the onions are translucent. 
3. Add the tomatoes, beans, broth and water. Bring to a boil. Reduce heat and simmer until the carrots are softened. 
4. Add the kale and sausage. Cook until the kale wilts.